Self-adhesive auto trim provides a simple, mess-free way to refresh exterior and interior edges. This guide introduces top self-adhesive molding strips that are easy to install, durable, and suitable for DIY enthusiasts, quick-wammers, and vehicle owners who want a budget-friendly upgrade. Each product section notes who it’s best for and any practical limitations to consider.
| Product | Width | Length | Best For |
|---|---|---|---|
| 16Ft Glossy Black 1 inch (25mm) | 1 inch | 16 ft | Exterior accents, bumper and door edge protection |
| 16Ft Glossy Black 3/4 inch (20mm) | 3/4 inch | 16 ft | Smaller trim areas, window frames, light scratches |
| 16Ft Chrome Silver 1/4 inch (6mm) | 1/4 inch | 16 ft | Fine lines, interior accents, subtle chrome look |
| Universal Glossy Black Body Side Molding 1 inch | 1 inch | 20 ft | Wider body side protection, universal fit |
| 16Ft Chrome Silver 3/4 inch (20mm) | 3/4 inch | 16 ft | Chrome accent on trim lines, bumper to door edges |
16Ft Glossy Black 1″ Self-Adhesive Trim

This 16-foot strip offers a bold, glossy black finish with a 1-inch width, ideal for exterior accents along bumpers, doors, and window edges. Best for owners seeking a strong visual upgrade with noticeable contrast against lighter paint colors. The longer length makes it suitable for larger vehicles or multiple trim runs. A potential limitation is visibility of edges on very curved surfaces, where careful alignment is required.
16Ft Glossy Black 3/4″ Self-Adhesive Trim
This 16-foot option uses a 3/4-inch width for more precise lines along edges or narrow trim areas. It is better for subtle contrast and for vehicles with tighter curves where a wider strip would be visually overwhelming. Be mindful of heat exposure in very sunny climates, which can affect adhesive longevity over time.
Universal Glossy Black 1″ Body Side Molding (20 ft)

Designed for vehicle bodies, this 20-foot roll provides generous coverage for doors and long side panels. Best for owners who want a cohesive, glossy black band along the body or those who plan multiple trim installations along wide surfaces. A caution is the longer length may require more planning to avoid misalignment across large curves or contours.
16Ft Chrome Silver 3/4″ Trim
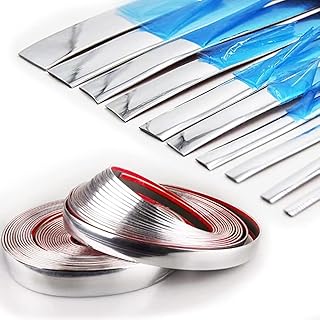
The chrome silver 3/4-inch strip blends a metallic accent with practicality, ideal for chrome-style lines along door edges, bumper seams, and window framing. Best for users seeking a bold but refined chrome accent without the width of a larger trim. Limitations include potential show-through on already textured surfaces where adhesion might be challenged by irregularities.
Buying Guide
What should I consider when choosing self-adhesive auto trim?
Width and length impact coverage and visual impact. Wider strips create a stronger look but may require more precise alignment on curves. Longer rolls save time for large vehicles but demand planning for waste and corner cuts.
Exterior or interior use—does it matter?
Exterior trims require stronger adhesion and weather resistance. Interior trims prioritize aesthetic balance and color matching. If installation is on harsh exterior areas, look for UV-resistant and scratch-proof claims in product descriptions.
Adhesion and surface compatibility
Most self-adhesive trims work best on clean, smooth surfaces. Degrease and dry surfaces before application. Curved panels may benefit from heat-assisted application to improve adhesion and reduce edge peeling later.
Color and finish decisions
Glossy black provides high contrast on light paints; chrome silver adds a metallic accent suitable for a prismatic look. For a subtle effect, choose narrower widths with a consistent finish to avoid overpowering the vehicle’s lines.
Durability and climate considerations
Consider heat, moisture, and road debris exposure. UV resistance helps prevent color fading, while scratch-proof claims indicate better protection against minor abrasions and scuffs over time.
Installation tips for best results
- Clean the surface thoroughly and let it dry completely.
- Mark straight lines with painter’s tape as a guide.
- Apply gradually from one end to the other, pressing firmly to secure adhesion.
- Avoid stretching the trim; let it settle into curves to reduce peeling.
FAQ
- Q: Can self-adhesive trim be removed without residue? A: Removal methods vary; apply gentle heat and lift from an edge to minimize residue.
- Q: Will these trims damage factory paint? A: When applied to clean, dry surfaces and removed properly, they should not damage paint; improper removal can cause surface disturbance.
- Q: Do trims come with mounting hardware? A: They are self-adhesive strips; no separate hardware is typically required.
- Q: How long does adhesion last in outdoor climates? A: Longevity depends on surface prep, temperature, and exposure; expect longer performance with UV-resistant materials and proper installation.
- Q: Are these trims suitable for curved surfaces? A: Wider trims can be challenging on tight curves; consider narrower widths for curved areas.
- Q: Can I cut trims to fit irregular shapes? A: Yes, most self-adhesive trims can be cut with standard scissors or a utility knife for custom fit.